Sunday, October 13, 2013

Spooky Speech & Language Spiders

Happy October!

Things are getting creepy in Mrs. Ludwig's Speech & Language Room with spooky spiders! 
Our door is covered!

I do admit, I HATE spiders (just ask my husband), but these little guys turned out pretty cute. The legs, bodies, and heads were all cut out and ready to glue together...and ready to target lots of different goals!

For the Sound Spiders, the kids said their sounds to earn a leg, and then they used my metallic markers to write words on the legs.

A quick definition lesson identifying the spider's category and attributes was drawn on the board. When I initially asked for the definition of a spider, one of my kiddos said ..."a spider is something that eats you"
And then we learned...
that by animal we meant insect (or the synonym, bug)
that by eats you, we meant bites you and makes webs

Here we have Synonym Spider. The younger kids had to find pre-printed synonym matches, use markers to color matching words the same color, & then paste the pairs on different legs. 

This little guy has describing words on his 8 legs.
Spiders can be....small, big, brown, black, creepy, hairy 
I pulled these pictures from a TpT product I found here!

Here we have Initial /R/ Spider:

And last but not least Synonyms Spider v2.0 (for the older kids). The kids picked a word (e.g. funny, spooky, scary) and looked up synonyms in the thesaurus. I spy lots of base words and suffixes, too!


We also read a few books about spiders from ReadingAtoZ (a resource I LOVE!) The Spider's Web and Tarantulas. And worked on various language goals with those!

Eek...spider webs everywhere!

That wraps it up for the Spooky Spiders! Thanks for checking in, and hope you're having a wonderful fall!

Mrs. Ludwig

Saturday, October 5, 2013

Fluency Toolbox for Stuttering

Hi all!

I'm excited to write about a resource I started using/making graphics for last school year, but finally felt it was ready to share on the blog:


The Fluency Toolbox for Stuttering


You can find it in my TpT store here
and here's how I use it:

I use the toolbox as a visual when I teach fluency strategies to my students. We aren't curing stuttering, but we are giving them a toolbox full of strategies that they can learn to use and apply to improve their fluency.

When we learn a strategy, we add the tool to the box. At the beginning of each session, we choose a tool (or a combination of tools) that we are going to focus on for the day. The tool sits in front of them and serves as a nice visual reminder of what we're working on during activities.


To give the kids ownership of their toolbox and express their fluency style, they can choose a toolbox in red, green, purple, pink, blue, or yellow!


There are several strategies out there to target fluency. The strategies I included in the packet are some of the most commonly used across many different intervention programs (Healey & Scott, 1995).The strategies included and described in this toolbox are:
  • cancellations
  • pull-outs
  • full breath
  • stretchy beginning
  • natural pauses
  • rate control
  • slow smooth & easy speech
  • breath and speech together
  • language planning
  • talk in short sentences
  • easy onsets & easy beginnings (same strategy just different lingo)
  • light contacts
  • continuous voicing
  • preparatory sets &
  • fake stuttering


A printer-friendly black and white version is also included. The kids can easily color their own tools!


Toolbox Assembly:
  • Cut out the toolboxes
  • Cut an opening on the solid black line to create the opening:

  • Staple the toolbox onto an 8.5x11 sheet of paper


  • Trim around the toolbox, removing the extra white paper
  • Cut out the tools & add them to the toolbox as they are taught


And that's it!  Also included is an entire set of blank tools in my TpT product so clinicians can add any other additional strategies!


And there you have it! What tools have you found helpful with your students? I would love to hear!

Thanks for checking in!
Mrs. Ludwig


Reference:
Healey, C. & Scott, L. (1995). Strategies for Treating Elementary School-Age Children Who Stutter: And Integrative Approach. Language Speech and Hearing Services in Schools, 26, 151-161.

Thursday, September 5, 2013

Happy New Year: 2013-2014: Calendar & Speech-Language Forms

Happy New Year, Part 2:

I just wrote about my new discbound notebook system, which you can read about hereAnd here is the follow up post with the sheets I created to put in my new book: 

#1) Parent Contact Log: each kid on my caseload gets a sheet for communication records.


#2) Activity Plan: the key to my sanity as I plan for 70+ kids. I write down each group of kids and the planned activity for the day. If I think of an activity, material, or skill for next time, I jot it down on the note sidebar:


#3) My Evaluation Schedule: I have a sheet for both of my schools to keep a track of requested evals:


  • Tracker notes
    • student name
    • referral source
    • eval type (artic, lang)
    • date permission sent
    • date permission received
    • date eval is due
    • check for testing completed
    • check for report is written
    • date of case conference

#4) My Calendar: monthly calendar printed double-sided on 8 1/2 x 11 in. sheets of paper:

August all the way through...


 ...the month of July!


#5) IEP at a Glance Sheets: these don't actually go in my binder, but I'm including them here anyway! They were passed out to teachers at the beginning of the year as overviews of IEPs. It was described as being "not as scary" as the ones that we usually print out that our IEP system generates. I'll count that as a compliment. Ha.


You can download my IEP at a glance sheet for FREE here.

You can purchase and download ALL of the forms & calendar pages in my TpT store here!
Or if you just like the forms and don't need a new calendar you can buy the forms here!

Hope your school year is still off to a great start!


Cheers,
Mrs. Ludwig


Sunday, August 25, 2013

Happy New Year! 2013-2014: Discbound Notebooks

Happy New Year, friends!

It's 2013-2014 and I'm refreshed, recharged and ready to tackle another year. I've worked on several organizational materials to set myself up for a successful year....but FIRST...

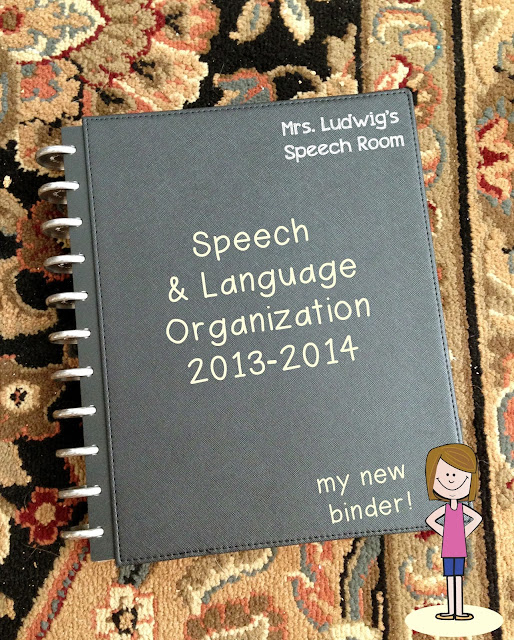
I'm using a new organizational system this year! I discovered Martha Stewart's discbound notebooks this summer and bought in big time. 

**A quick disclaimer: I'm writing about these just because I like them! Plain and simple. No financial interests or gained benefits here. :)

Okay, here's a top view:


The best way to describe them is as a "notebook/binder hybrid". Flat like a notebook and built like a binder.  It's a totally customizable system. You can buy different parts and create your own binder to fit your own needs.

On the inside front cover is a big pocket & a few smaller pockets (mine has an article to read from our principal & some sticky notes):

A row of discs holds everything together. The binder comes with small discs, which can hold ~60 sheets, so I bought the expansion discs, which will hold up to 150 sheets:


Martha's line also includes pre-punched accessory pages (e.g. calendars, taskpads) that fit in as needed. I went ahead and bought the special hole-puncher so I could make my own pages.
Punch, punch

The pages are punched like this:

And then you just push the pages right into place! 
 That's it, easy:

You can buy dividers and place them to make sections as needed. I labeled mine with my label maker. 
Another nice feature is the pen holder (look below the tabs):


I made my own calendar & inserted a small sheet between the current month as a task pad. For now, it's just a yellow, 1/2 sheet of paper. Eventually, my plan is to design something a little nicer. But, hey it works just fine for now!


I've included my caseload spreadsheets,
parent contact forms, activity idea section, my calendar.


I will admit, the startup was a little pricey. The hole punch was the biggest investment ($40), but I'm convinced it will be a long-term solution to my organizational needs. It's the system you can just keep using over and over!

You can find the Martha Stewart discbound notebooks exclusively at Staples:

Here's the link to the notebooks: Book.
And the tabs: Divide.
And some other accessories: Accessorize.
And the hole punch: Punch.

So there you have it! My organizational solution for the 2013-2014 school year and beyond.

Hope you're off to a good start at school! 

Happy New Year,
Mrs. Ludwig


Monday, July 15, 2013

Vocabulary Instruction: a presentation for teachers

After I presented to our staff on language impairment (You can find that presentation HERE!), I had a teacher come find me with a cool vocabulary dictionary to share. She told me that I could present it to our staff if I thought it was a good resource. I suggested that we present it together (collaboration, yes!) and used it as an opportunity to provide more professional development to our teachers on the topic of vocabulary, an area that lots of our language kids work on in speech-language therapy.

And that's how Part 2 of my professional development presentation for our teachers came about:


I had just read an AWESOME book: Bringing Words to Life: Robust Vocabulary Instruction by Beck, McKeown, and Kuchan (2002), which has been referenced in TONS of academic and professional circles. 


If you haven't checked this one out, you should! I came across it first in some of my online research. Then, one of my principals listed it as one of her favorite books in a staff e-mail. And at that point, I knew I had to have it and with a 1-click stop in my Amazon shop, the book quickly arrived on my doorstep. The book was also mentioned in one of my ASHA sessions last November in Atlanta. It's everywhere!

Bringing Words to Life was the basis for the following slides and talking points. So part 2, here we go!


A quick overview to start:


I highlighted the key points from my previous presentation on language impairment that were related to vocabulary.


Also included was some pretty 
important research with some pretty big implications:


And then I talked about the relationship between vocabulary and reading comprehension, which is a big struggle for a lot of language-impaired kids. 


My example was this: 

Take this paragraph and pretend 
you don't know the red underlined words...


...which would mean you're essentially reading this:

Now given that, can you answer main idea/detail or inference questions about it? Probably not.

Then I introduced Bringing Words to Life, which has practical suggestions for both 1) what to teach and 2) how to teach vocabulary.


The authors note that conventional wisdom teaches us that we learn vocabulary from context. Before entering school, kids learn from an oral context. Once kids get to school, there is a shift in focus to acquiring words from written text. There are several state and common core standards based on using context-clues to learn words.

The authors argue that oral language contexts are much more conducive to learning vocabulary because of the added intonation and meaning available. Using written text as the primary source for vocabulary acquisition becomes even more of an issue for struggling readers. 
  

If a kid can't decode very well and most of the brain power is focused on figuring out what the word is, the chances that he or she is learning what the word means is probably slim to none.

Even with good decoding skills, not every word meaning can be deduced based on the context. 

See the below example:


...hard to tell the tone of that paragraph unless you already know what the word grudgingly means.

The authors introduce Tier 1, Tier 2, and Tier 3 words. Tier 2 words are the academic words that are especially important for reading comprehension.


The authors recommend the following:

When the authors write about student-friendly definitions, they say that longer definitions with lots of information are better for leaning and understanding words than some standard dictionary definitions. 

For example, take a look at the word disrupt in the following example:


...words may be commonly misused if a standard dictionary definition doesn't capture the essence of the word. Student-friendly definitions are preferred!

At the end, I brought the information back to the classroom and encouraged teachers to 1) read the book if they were interested, and 2) have rich verbal environments in the classroom to benefit not just kids with a language impairment, but all kids!

Teachers can:

  • Teach the kids to pay attention to new words
  • Connect with words beyond just the classroom
  • Use various dictionaries: unabridged, learner 
  • Use vocabulary words in morning meetings and on notes
  • Have a word of the day
  • Use crosswords and scrabble games to make vocabulary fun and exciting

...teach kids to love words! What ways do you create rich-verbal environments in your speech and language rooms? What ways do you see teachers doing this in the classrooms? I'm curious!

And so ends my PD Presentation Part 2. My principal has already requested a part 3 presentation on a new topic for next year, so stay tuned!

Thanks for stopping by!

Mrs. Ludwig

p.s. As I've written this, I just found a post that was written by Jenn over at Crazy Speech World about how she collaborated with a teacher to create student-friendly definitions based on Beck, McKeown, & Kucan's work. Love it! Check it out HERE! :)